00 Overview
This course walks one student from a blank Raspberry Pi to a fully functioning Skittles colour-sorting machine, in the same order the original build actually happened: code first, then hands, then everything wired together. Every week points at a real file from the project as a worked example — never as the only correct answer.
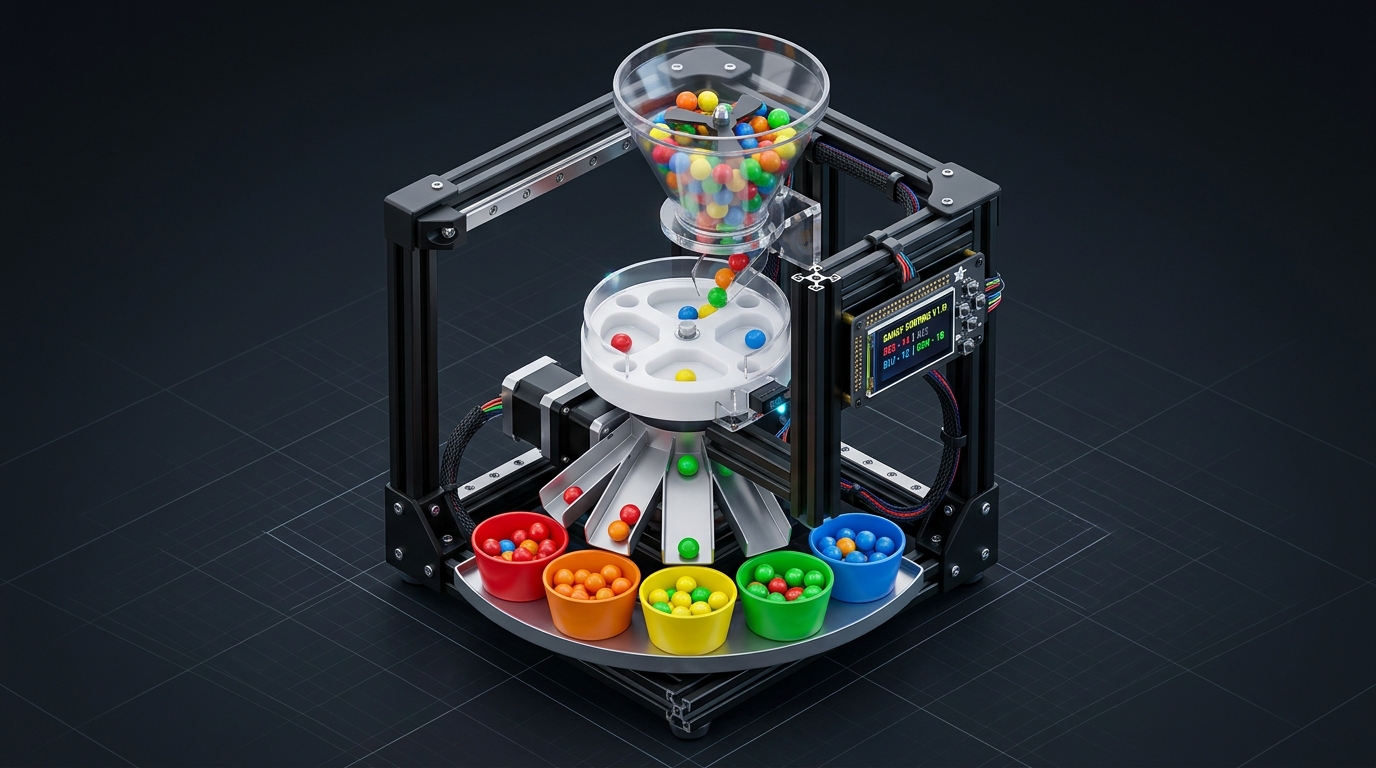
Why "Entropy Reducer"?
A freshly opened bag of Skittles is about as disordered as a small system gets: the colours are mixed with no discernible pattern, and there are vastly more ways to arrange them jumbled than sorted into five neat piles. In physics, that disorder is entropy — and the machine's entire job is to take a high-entropy bag and turn it into a low-entropy one, colour by colour. It's not a coincidence that the original build's own start-up screen already introduces itself this way (see splash_screen() in main_loop.py): it prints "Entropy" and "Reducer" before anything else happens.
This is also a genuinely good physics conversation to have with a student, not just a pun: the second law of thermodynamics says the total entropy of an isolated system never decreases, so how can a machine reduce it at all? The answer is that the machine isn't isolated — the motors, sensor, and Raspberry Pi all draw electrical power and dissipate it as heat into the room, increasing entropy out there by considerably more than the small amount of order created inside the machine. It's the same trick a refrigerator pulls: order inside, paid for by more disorder outside. Worth raising explicitly around Week 8, when the classifier is quite literally the part of the machine doing the "reducing."
Microcontrollers & Linux
GPIO, sensors, an LCD menu, a Raspberry Pi as the machine's brain.
Coding & software
Python fundamentals through to a working colour classifier.
3D design & printing
Parametric tables, DFAM, M3/M2.5 insert standards, subsystem CAD.
Electronics
Ohm's law, breadboarding, soldering, power selection.
Hardware & assembly
A frame that everything else bolts to — extrusion is one option, not the rule.
Documentation & workflow
Version control, backups, and an honest build log.
This isn't a kit to assemble
- The original machine sorts Skittles, but it's not a gold standard — Skittles still jam in its feeder sometimes, and the slide can get knocked out of alignment if it's bumped. It's shown as an honest example of what "working" looks like in practice, flaws included, not a blueprint to reproduce exactly.
- Every "Refs" line under a week points at the file that solved that problem in the original build. Reading it, understanding it, and adapting it is the point — copying it verbatim isn't required, and building it differently is welcome wherever the underlying skill still gets exercised.
- A different wheel shape, a different number of buckets, a different frame material, a different feeder mechanism entirely — all fine, as long as the checkpoint for that week is genuinely met. The goal is a student confident enough with these tools to solve the problem their own way, not a copy of someone else's machine.
- In that spirit, this machine has a name it earned rather than one it was assigned (see below) — encourage your student to name hers too, early on. It's a small thing, but "my machine" becomes "Prism" or "The Untangler" the moment it feels like a project worth being proud of rather than an assignment to finish.
01 Prerequisites & kit
No prior coding, CAD or electronics experience is assumed — the first four weeks teach each from zero. What matters more is patience: nearly every week ends with something that doesn't quite work yet, and the fix is next week's lesson.
| Category | Item | Notes |
|---|---|---|
| Compute | Raspberry Pi Zero 2 W, SD card, 5V micro-USB PSU | Cheap and plenty for this project; runs headless, controlled remotely over SSH / VS Code Remote. Needs a header soldered on and a short GPIO extension so the Motor HAT can sit alongside it rather than stacked on top. |
| Motion | Adafruit Motor HAT + 2× NEMA-17 stepper motors | One drives the inspector wheel, one drives the sorting slide |
| Homing | 2× mechanical limit / contact switches | Velleman VMA327 or similar, one per motor |
| Vision | Adafruit AS7341 10-channel spectral sensor | Used in 8-channel mode: Violet–Indigo–Blue–Cyan–Green–Yellow–Orange–Red. Has its own onboard white LED for consistent illumination of each Skittle — separate from the NeoPixel below. |
| User feedback | NeoPixel LED strip/ring (5 px) | Purely a status indicator for the operator — the sensor illuminates itself (see below) and doesn't rely on it |
| Display | Adafruit 1.3″ Color TFT Bonnet (240×240 + joystick + 2 buttons, product 4506) | Mounted at the enclosure's front via a GPIO ribbon cable + stacking header (a bonnet plugs straight onto the Pi by design; this build relocates it for a front-facing screen) |
| Frame | Aluminium extrusion + brackets + M3/M5 fixings | Built last, once part positions are known |
| Fabrication | 3D printer + PLA/PETG · laser cutter (e.g. xTool F2 Ultra) + 3mm ply or acrylic | Printed parts for moving mechanisms, laser-cut for the flat base |
| Bench | Soldering iron, solder, breadboard, jumper wires, multimeter | Basic bench kit — not consumed by the project alone |
| Software | Fusion 360 · a slicer · VS Code + Remote-SSH · Python 3.11 · Google Drive or git | All free-tier / education-licensed |
| Consumable | A few packets of Skittles | For scanning and sorting only — not for eating after they've been through the machine |
Think like an engineer, not an assembler
Objectives
- State the actual brief — sort Skittles by colour, automatically — with no assumptions yet about how.
- Break any solution into the same five jobs: feed, sense, decide, act, structure & power.
- Brainstorm at least three genuinely different ways to solve each of two of those jobs before seeing this course's own answer in detail.
Hands-on
- Sketch (paper is fine) two complete system architectures — e.g. this course's wheel-and-slide approach vs. a conveyor belt feeding pusher solenoids into fixed lanes, or moving cups on a carousel instead of a moving chute.
- Write one paragraph committing to a direction — following the reference design, adapting parts of it, or building something structurally different — and why.
Python & project setup
Objectives
- Flash Raspberry Pi OS and get a headless Pi talking over SSH.
- Connect VS Code's Remote-SSH extension so all coding happens on the Pi from day one.
- Python fundamentals: variables,
forloops, functions, f-strings, and reading command-line arguments. - Understand the six subsystems the finished machine is made of, and how this course visits each one.
Hands-on
- Work the "Skittles Coding Playground" exercises: a multiplication-table loop, then a function with its own local variables.
- Write a small script that takes a number on the command line and prints a transformed result — the same
argparsepattern the classifier will use later.
Skittles Coding Playground.ipynbskittles_classifier.py (argparse)Voltage, GPIO & first circuits
Objectives
- Ohm's law and why current, not voltage alone, is what damages components.
- Digital I/O: an LED as an output, a switch as an input, and why switches need debouncing.
- 3.3V logic vs. the higher voltages the motors will need later — never mix them directly.
Hands-on
- Build an LED + resistor circuit on a breadboard, then drive it from GPIO in Python.
- Wire a contact switch and write a polling loop that reads it reliably.
blink/blink_1.pycontact switch/switch_1.pycontact switch/switch_2.pyParametric design in Fusion 360
Objectives
- User parameter tables: driving bracket geometry from physical fastener and motor dimensions.
- Fully-constrained sketch geometry: locking every degree of freedom to origin planes.
- NEMA-17 stepper motor mounting standard, slotted adjustment channels, and M3 heat-set insert standoffs.
Hands-on
- Model a fully parametric NEMA-17 stepper & limit switch mounting bracket from scratch in Fusion 360.
- Export to STL and verify that changing user parameter values updates solid geometry cleanly.
cad-engineering-guide.html3D Files/plate_stepper.stl3D Files/plate_zero_v2.stl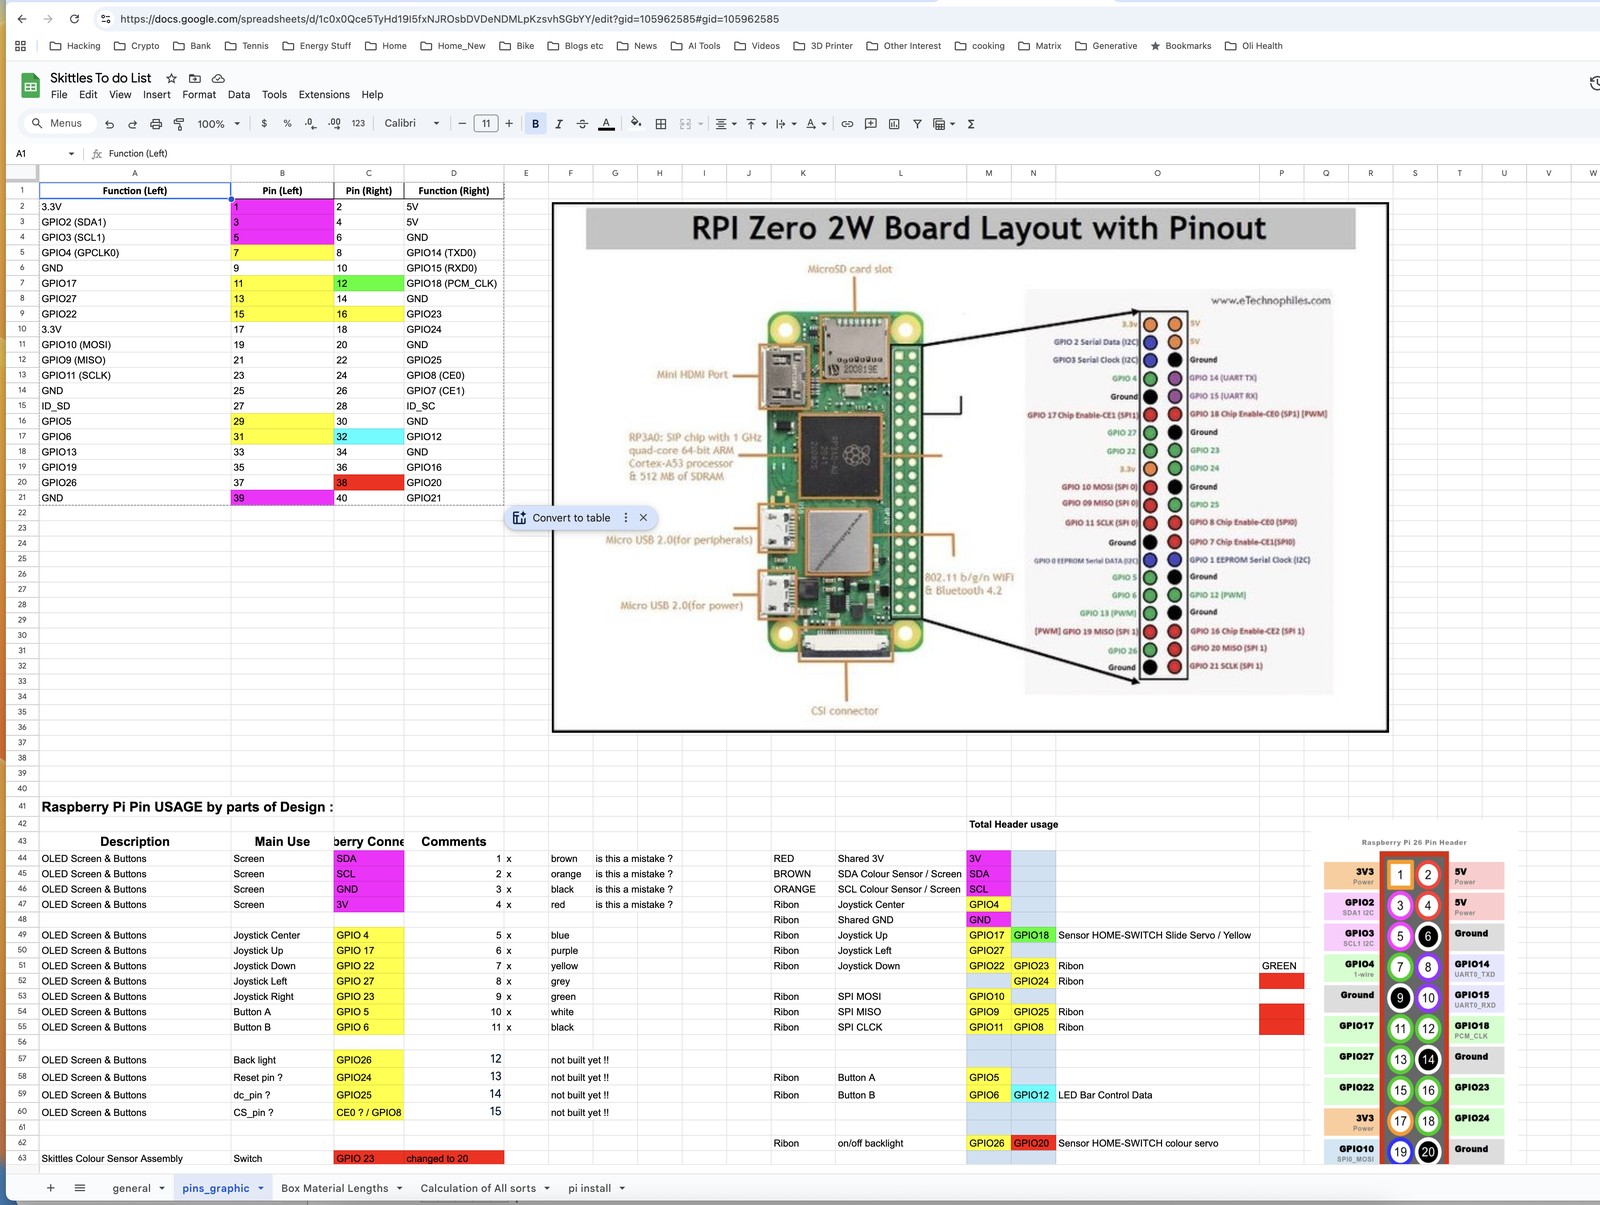
full_design.f3z)3D printing & laser cutting
Objectives
- Design for Additive Manufacturing (DFAM): layer shear anisotropy, perimeter wall strength vs infill, and base chamfers.
- Thermal installation of M3 brass heat-set threaded inserts into printed standoffs.
- PETG vs PLA filament selection for thermal stability near 50°C stepper motors.
- Laser-cutting kerf compensation on the xTool F2 Ultra for tight-fitting flat base panels.
Hands-on
- Slice with 4 perimeters and print the Week 3 bracket in PETG/PLA; thermally install 4× M3 brass inserts.
- Laser-cut the chassis base panel with kerf offset and fit-check all motor and switch hardware.
cad-engineering-guide.htmllaser files/laser_base.dxf3D Files/base.stl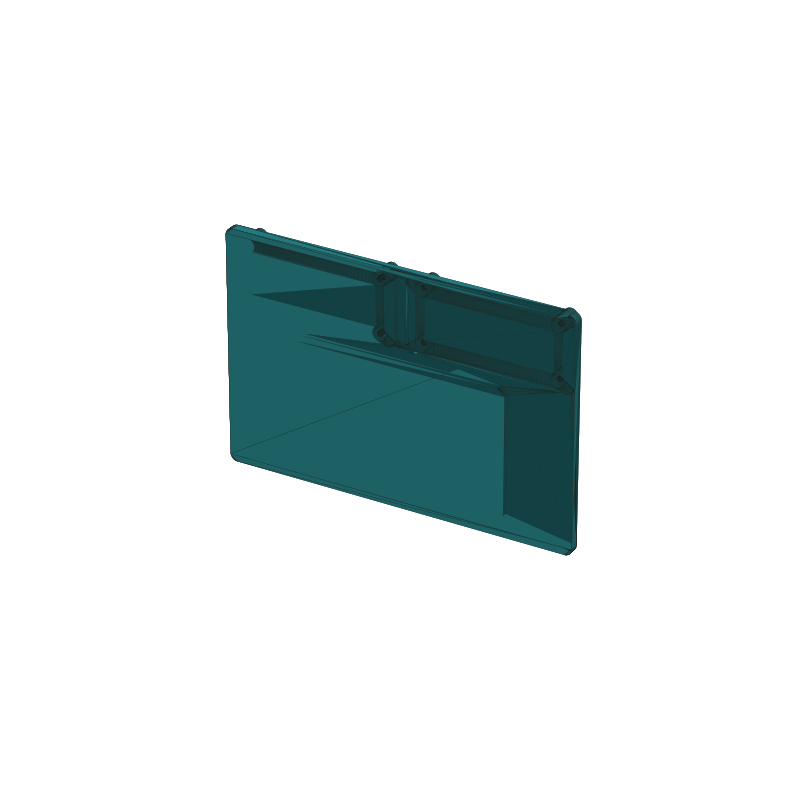
plate_zero_v2.stl with M3 brass insert pilot bores and slotted NEMA-17 mounting slots.Stepper motors, rotary cams & precision homing
Objectives
- Open-loop actuators: why steppers have zero memory of angle on boot and drift over time.
- Rotary cam lobe mechanics (
cam.stl): why a smooth eccentric ramp beats a hard physical stop in continuous 360° sorting. - Microswitch hysteresis: understanding Operating vs Release positions to eliminate contact bounce.
- The 3-phase homing algorithm: Fast Seek → Slow Hysteresis Release → Calibrated Datum Offset.
Hands-on
- Mount NEMA-17 stepper +
cam.stl+ roller microswitch intoplate_stepper.stl. - Wire the Motor HAT to 12V PSU and microswitch to GPIO20 with internal pull-up.
- Implement the 3-phase
precision_home_wheel()Python routine and test 90° indexing moves.
cad-engineering-guide.html#homing-camweeks/week-05.html3D Files/cam.stl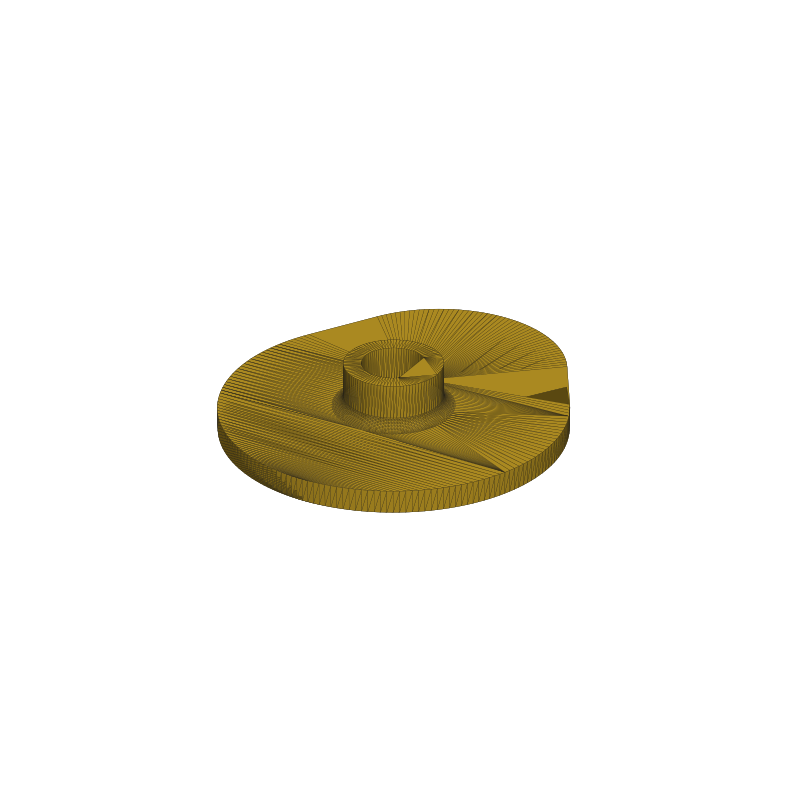
cam.stl eccentric rotary cam with D-shaft flat and M3 grub screw clamping collar.Building the inspector wheel
Objectives
- Combine CAD, printing, and motor control into a precision indexing subassembly.
- Design a positive 5mm D-shaft collar with an M3 grub screw insert and a radial homing cam.
- Model the optical darkroom shroud (
inspection.stl) at an 8mm focal height to isolate the AS7341 from ambient photons.
Hands-on
- Model, slice, and print the 4-pocket wheel with 7° draft angles and outer retaining lip.
- Write the automated switch-homing and 90° indexing controller in Python.
cad-engineering-guide.html3D Files/wheel.stl3D Files/cam.stl3D Files/inspection.stl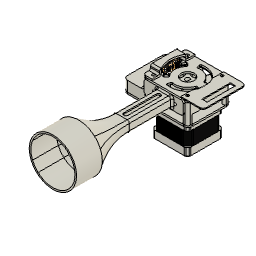
wheel.stl (4-pocket wheel)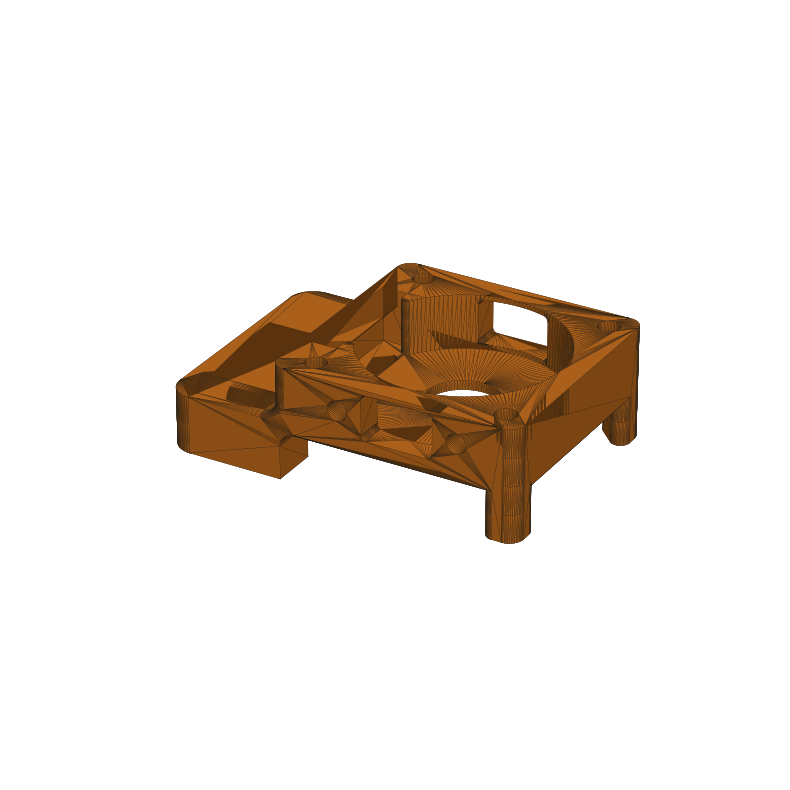
inspection.stl (Optical shroud)Colour sensing with the AS7341
Objectives
- What a spectral sensor actually measures — eight wavelength bands, not one RGB triple.
- I2C wiring, and why controlled illumination (the sensor's own onboard LED) matters more than sensor sensitivity.
- Structured data logging: one row per scan, one column per channel, always the same order.
Hands-on
- Wire the AS7341 over I2C and the NeoPixel (a separate, user-feedback indicator) on GPIO12; read and print all eight channels live.
- Collect a labelled dataset: at least five scans per Skittle colour, saved as a tab-separated file matching the project's schema.
Light Sensor/sensor_1.pyLight Sensor/sensor_2.pyData from Scans/skittles.tsv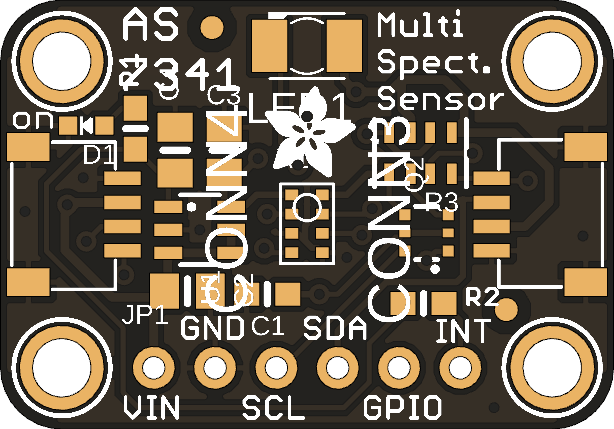
8-Channel Spectral Sensor Board
inspection.stl8mm Calibrated Darkroom Hood
Building a colour classifier
Objectives
- Normalisation — dividing a reading by its own total so brightness stops mattering, only shape does.
- A centroid classifier: the mean spectral "fingerprint" of each colour, compared to a new reading by cosine similarity.
- Leave-one-out validation as an honest way to estimate accuracy from a small dataset.
Hands-on
- Implement
_normalize()and_cosine_sim()from scratch before comparing against the reference implementation. - Train centroids on the student's own Week 7 data; run the leave-one-out evaluation and report per-class accuracy.
skittles_classifier.pyhow_to.txtThe sorting slide
Objectives
- Gravity slide slope physics: candy friction (μ ≈ 0.45) and minimum 32° chute inclination angles.
- Minimizing rotational moment of inertia ($I = m \cdot r^2$) for high-speed direction reversals without missing steps.
- Mapping classification labels to a 5-bucket radial distribution arc.
Hands-on
- Model, slice, and print the 32° directional slide and 5-cup radial receiver plate.
- Wire the second motor and limit switch (GPIO18); code
go_to_bucket()with relative step movements.
cad-engineering-guide.html3D Files/slide_v1.stl3D Files/base_for_slide.stl3D Files/cup_plate.stl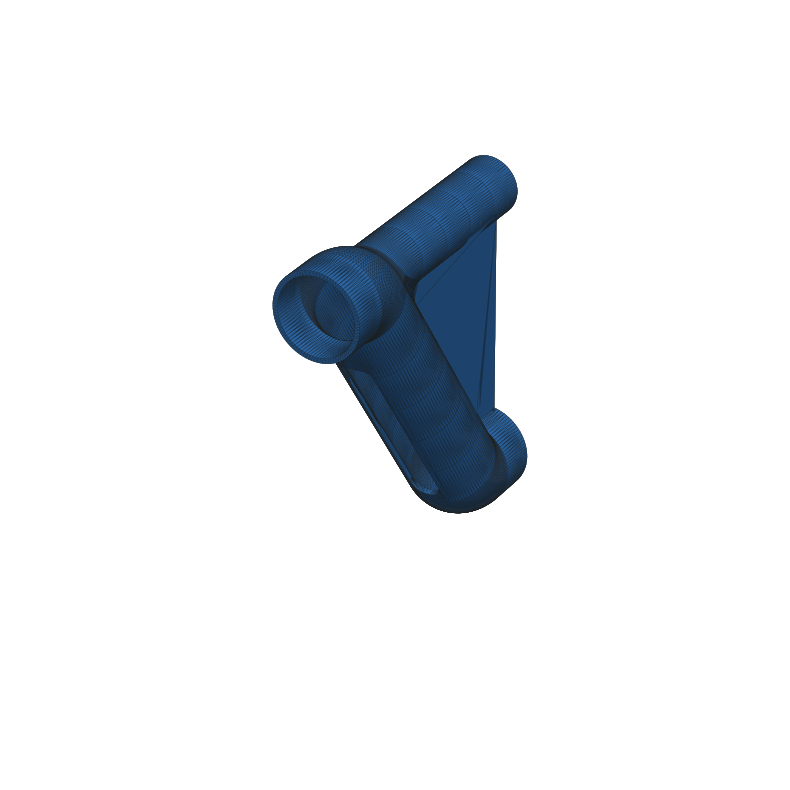
slide_v1.stl 32° low-friction gravity chute with NEMA-17 shaft mount.Feeder & agitator
Objectives
- Hopper geometry: particulate bridging physics and steep ≥65° funnel wall angles.
- Singulation throat geometry (15mm × 10mm) and oscillating agitator paddle CAD.
- Empirical failure logging across 50-candy trial runs.
Hands-on
- Model and print the anti-bridge hopper cone and cam-driven agitator arm.
- Execute 50-candy feed trials, logging clean feeds vs double feeds vs bridge jams, and iterate clearances.
cad-engineering-guide.html3D Files/feeder_body.stl3D Files/cone.stl3D Files/agitator.stl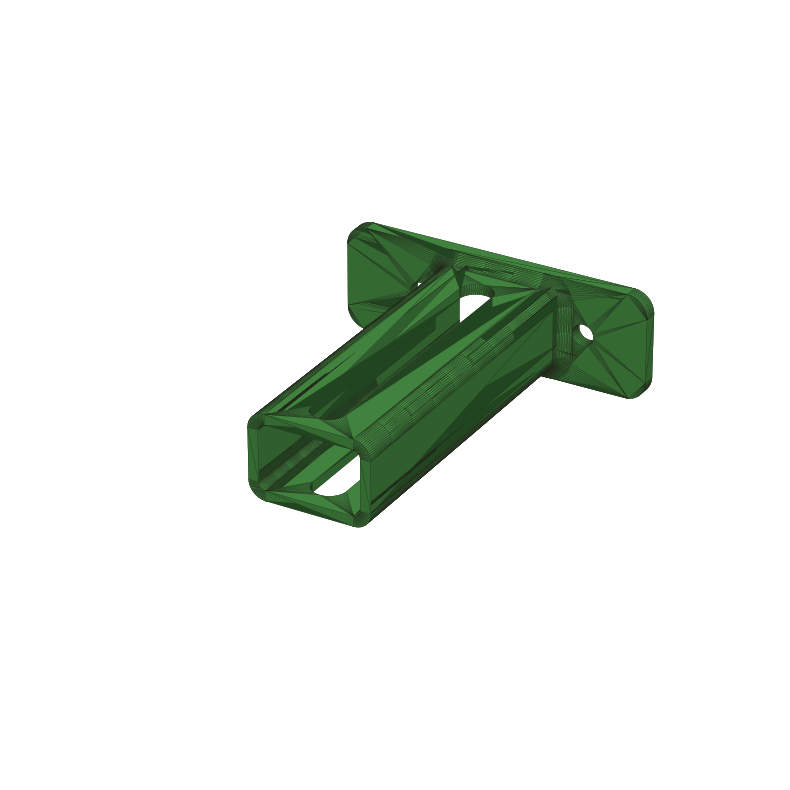
feeder_body.stl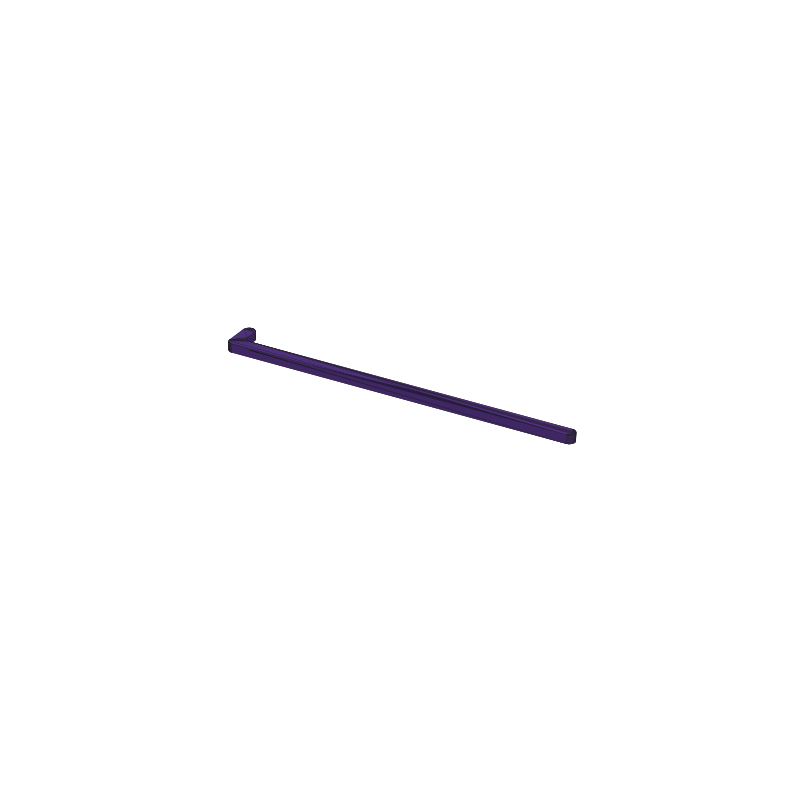
agitator.stlIntegration & the main loop
Objectives
- The 8-step scan pipeline: Index → Settle → AS7341 Capture → Cosine Classify → Chute Position → Drop → Telemetry → Auto-Stop.
- State machine architecture: 7-button LCD menu, calibration workflows, and error recovery.
- Autonomous run loop: 3-empty pocket detection for clean hopper exhaustion.
Hands-on
- Mount the 1.3″ TFT Bonnet into
screen_holder.stl; wire all GPIO controls. - Integrate all subsystems into
main_loop.py; verify end-to-end sorting run.
software-architecture-guide.htmllatest_code/main_loop.pylatest_code/test_system.py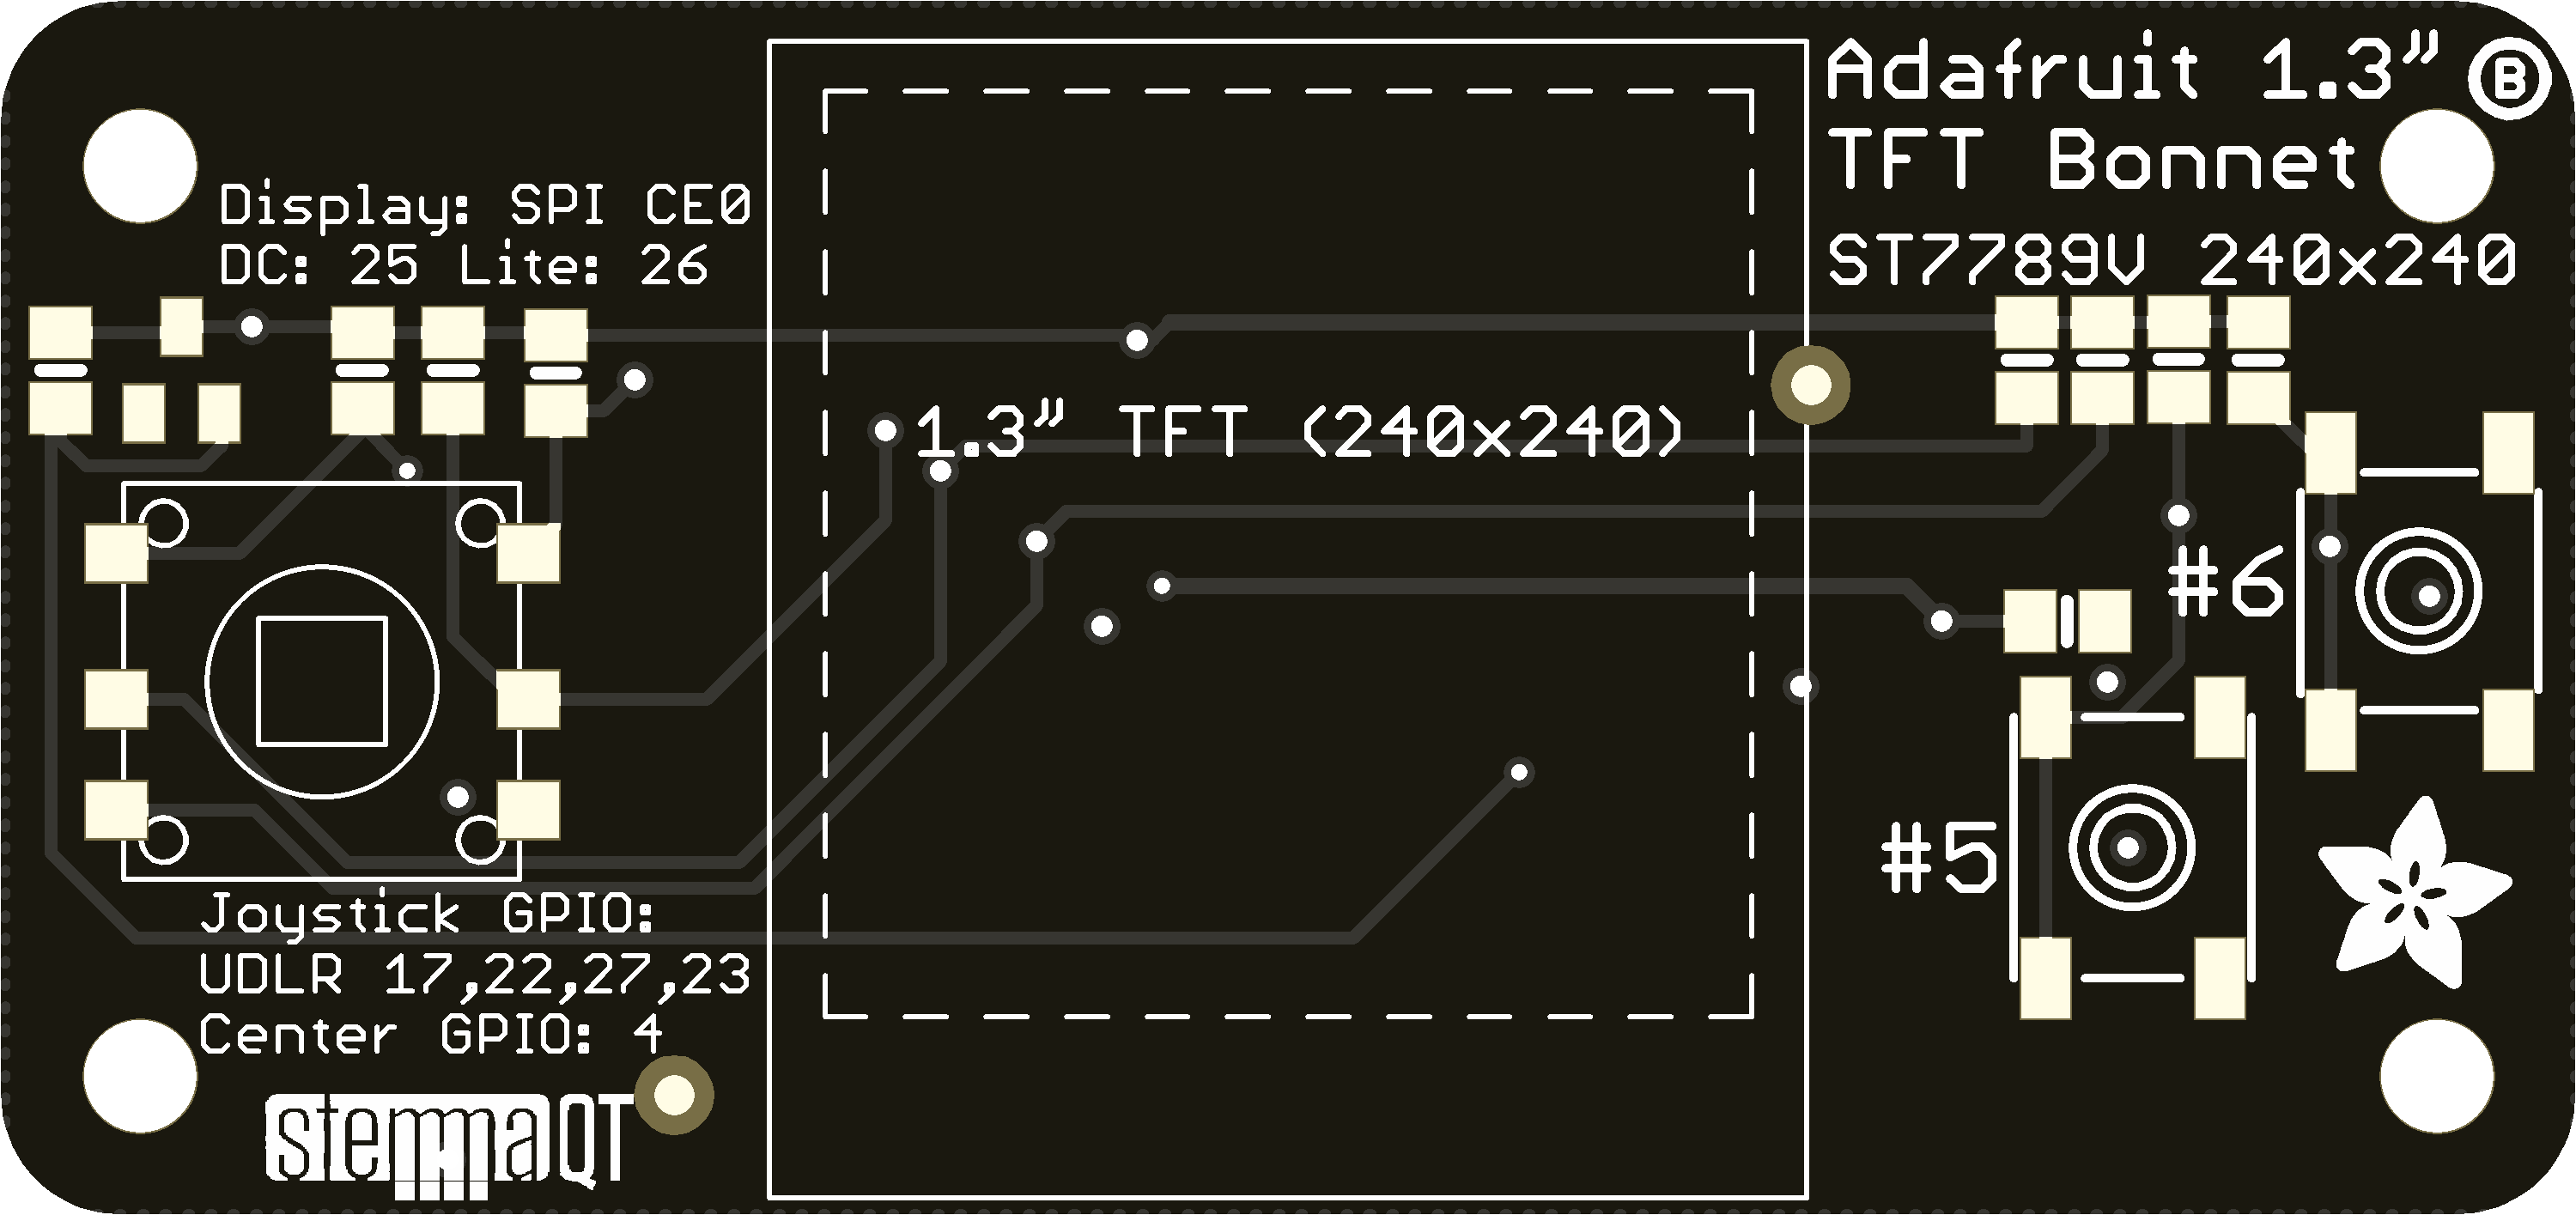
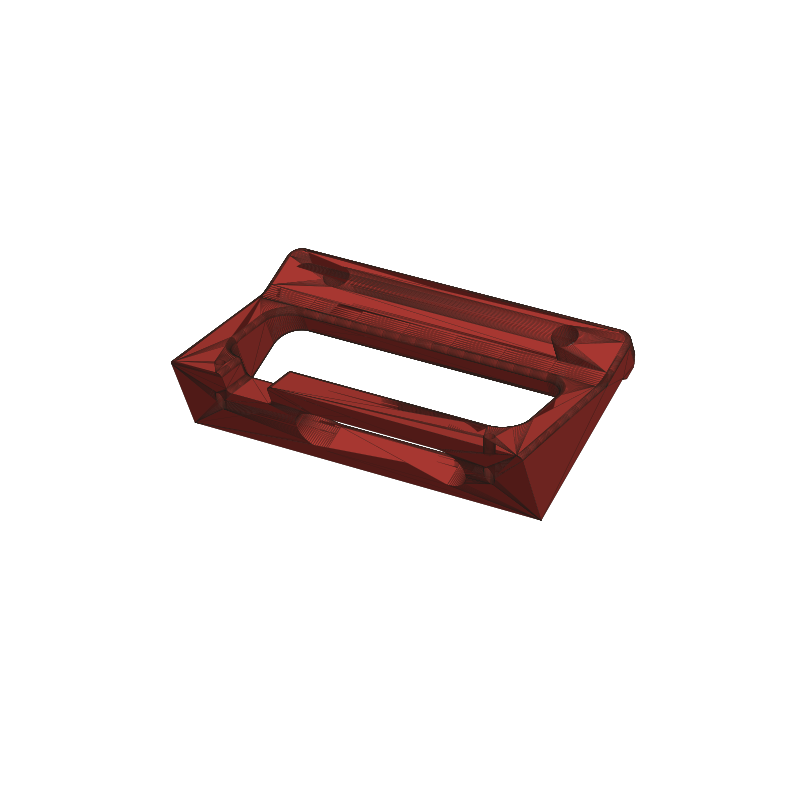
screen_holder.stlFull integration
Objectives
- The 8-step scan & release pipeline: status framebuffer → auxiliary strobe → 8-channel read → cosine classification → NeoPixel telemetry → chute angle steer → wheel discharge → motor release.
- The autonomous repeat loop: 3-consecutive-empty pocket auto-stop heuristic.
- Connecting the TFT Bonnet's joystick + buttons as a menu, and using the display to show machine status rather than only printing to a terminal.
- Structured logging and exceptions, so a fault says what failed instead of just stopping.
Hands-on
- Study
main_loop.pyas a worked example, then build a simplified state machine that reuses the student's own Week 6–9 subsystems. - Wire the TFT Bonnet via a stacking header + ribbon cable so it can sit at the enclosure's front rather than stacked on the Pi; show live status and the last classification result.
software-architecture-guide.htmllatest_code/main_loop.pySkittlesSorter/src/utils/logger.pyFrame, calibration & showcase
Objectives
- Final mechanical assembly on an aluminium-extrusion frame, once every subsystem's real position is known.
- Calibration as a repeatable process: illumination level, homing offsets, per-colour thresholds.
- Communicating the build — what worked, what broke, and what the student would do differently.
Hands-on
- Build a frame and mount every subsystem from the previous eleven weeks — aluminium extrusion is the original's choice; plywood, printed brackets, or anything else rigid enough to hold alignment is equally valid.
- Run a full batch-sort trial on a mixed bag of Skittles and measure accuracy and throughput, on whatever version of the machine got built.
- Write a short retrospective and demonstrate the finished machine live — including what's different from the reference build, and why that choice was made.
batch_analytics.pyAluminium extrusion Specs.pngSkittles_Maker_Project.docx02 Safety
Nothing here is exotic, but each tool deserves a specific rule rather than a generic warning.
Soldering iron
250–350°C tip. Use a stand, ventilate fumes, and treat every tip as hot until proven otherwise.
Laser cutter
Never leave a cut unattended; keep the lid closed while firing; know where the fire extinguisher is before the first cut, not after.
Motor power
Stepper drivers get warm and motors can too — always call .release() when idle, and keep the motor-release recovery script one command away.
Mixed voltages
3.3V logic, 5V logic, and motor supply voltage are not interchangeable — check a wire's voltage before it touches a GPIO pin.
Food hygiene
Skittles that have been through the machine are for testing, not eating — treat them as mechanical test material once they've touched printed or laser-cut parts.
03 Assessment
Each week ends with a checkpoint, not a grade — it's a plain statement of what "done" looks like, so both student and instructor can tell honestly whether to move on. Checkpoints judge whether the underlying skill was demonstrated, not whether the result looks like the reference machine — a differently-shaped wheel that reliably indexes passes Week 6 exactly as well as a copy of the original. The course-final grade (where one is needed) can be built from these directly.
University-Grade Capstone Rubric & Oral Defense Guide
Complete 100-point scoring matrix, milestone sign-off logbook, power budget table, and week-by-week oral defense question bank.
| Weeks | Weighting | What's being judged |
|---|---|---|
| 1–4 · Foundations | 20% | Working dev environment, one clean CAD part, one printed and one laser-cut part |
| 5–6 · Motion | 15% | Reliable homing and indexing on the inspector wheel |
| 7–8 · Sensing & classification | 20% | A real labelled dataset and a working classifier with an honestly reported accuracy |
| 9–10 · Sorting & feeding | 15% | Correct bucket routing and a feed mechanism debugged through real trials |
| 11 · Integration | 10% | One working end-to-end scan → classify → sort cycle |
| 12 · Final demo | 20% | Live batch-sort demonstration plus a written or spoken retrospective |